

Picking the wrong garment printer software costs you more than money. It costs you reprints, customer complaints, and production delays that compound fast when you’re running print-on-demand at volume. A structured garment printer software checklist cuts through the noise and gives you a repeatable framework to evaluate any platform before you commit. This article covers every critical checkpoint, from preflight validation to DTF/DTG workflow support, batch automation, and long-term scalability. Whether you’re setting up your first RIP suite or auditing your current stack, this guide tells you exactly what to look for.
Table of Contents
- Key takeaways
- 1. The garment printer software checklist starts with preflight validation
- 2. DTF and DTG workflow requirements
- 3. Color management and ICC profile support
- 4. Gang sheet creation and nesting features
- 5. Workflow automation and batch processing
- 6. Comparison of top garment printing software options
- 7. Decision-making tips for matching software to your business
- My take on software checklists and where shops go wrong
- How Pythiastechnologies supports your garment printing workflow
- FAQ
Key takeaways
| Point | Details |
|---|---|
| Preflight validation is non-negotiable | Software must check resolution, color mode, and bleed automatically before any job enters the queue. |
| DTF/DTG modes require dedicated setup | White ink channel activation and separate calibration are foundational to consistent output on film and fabric. |
| Batch automation drives ROI | Unattended batch processing and automated job sequencing reduce setup time and scale output without adding labor. |
| Comparison shopping needs a framework | Evaluate software on color management, workflow automation, and integration depth, not just UI or price. |
| Match checklist results to your growth plan | Prioritize features that align with your current volume and your 12-month production targets. |
1. The garment printer software checklist starts with preflight validation
Before a single file reaches your printer, your software needs to catch the errors that cause reprints. Preflight validation should check resolution at 300 DPI minimum, confirm CMYK color mode, and verify a 0.125 inch bleed on every job. These are the three most common failure points that lead to job rejection at the production stage.
Your checklist for this section should include:
- Resolution check: Flags any file below 300 DPI before it enters the queue
- Color mode validation: Confirms CMYK and rejects RGB files or prompts conversion with the correct ICC profile embedded
- Bleed and safe zone enforcement: Verifies 0.125 inch bleed and checks that critical elements stay within safe zones
- Font embedding: Confirms all fonts are embedded or converted to outlines to prevent substitution errors
- Transparency handling: Checks for transparency and white pixel artifacts that create halos or fringe in final prints
Pro Tip: Set your preflight rules as a saved profile in your RIP software so every operator applies the same standards automatically, regardless of experience level.
Software that runs these checks manually is a liability at scale. Automated preflight that triggers on file upload is the standard you should hold every platform to.
2. DTF and DTG workflow requirements
DTF and DTG are not interchangeable workflows, and your software needs to treat them differently. DTF workflows require RIP software set to DTF mode with a CMYK plus white ink profile and PET film media selected. Skipping this step causes color shift and white fringe problems even when the artwork file is perfect.
Key items on your DTF/DTG software checklist:
- DTF mode activation: Confirms the software has a dedicated DTF mode, not just a generic print profile
- White ink channel setup: Verifies the white channel is active and mapped correctly for underbase and highlight layers
- White ink opacity controls: Allows adjustment of white ink density for different fabric colors and garment weights
- DTG ink usage controls: Per-garment ink costs vary significantly; software should give you coverage controls to manage cost per print
- Underbase optimization: Provides settings for underbase thickness on dark garments to prevent color bleed-through
Pro Tip: When evaluating any platform for DTF, run a test print on black PET film before committing. White ink fringe shows up immediately and tells you whether the calibration tools are adequate.
Color management is the gatekeeper here. Software that lacks dedicated DTF/DTG modes will force you into workarounds that introduce inconsistency at every run.
3. Color management and ICC profile support
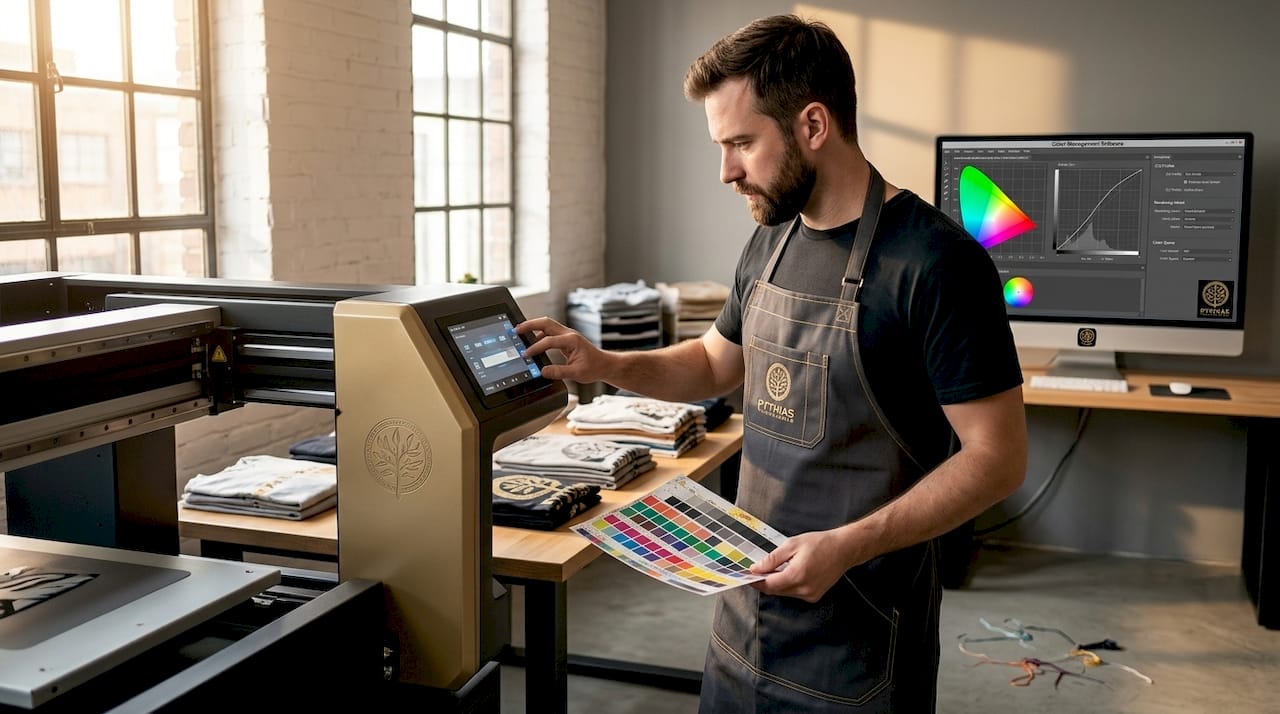
Color accuracy is not a nice-to-have feature. It is the difference between a repeat customer and a chargeback. Your software checklist needs to confirm that the platform handles ICC profiles correctly across every output scenario.
The minimum standard is that software supports loading, embedding, and switching ICC profiles per job or per printer. Beyond that, look for built-in calibration workflows that automate the linearization process. ICC profile validation and calibration automation reduce color drift between runs and eliminate the guesswork that comes with manual adjustments.
For DTF specifically, white ink channels require separate linearization from CMYK. Software that runs a single calibration pass for all channels will produce opacity inconsistencies on white ink layers. This is a common oversight that costs shops significant rework time.
Confirm that the software also supports soft proofing so operators can preview color output against a specific ICC profile before committing to a print run.
4. Gang sheet creation and nesting features
Gang sheets are where DTF shops recover margin. Fitting more designs onto a single sheet reduces material waste and cuts cost per print. Your printer software for apparel needs to handle this automatically, not require manual layout every time.
Gang sheet optimization features reduce material waste and maintain color accuracy across multi-design runs. The software should nest designs intelligently, respect margin requirements, and apply the correct ICC profile to each design on the sheet without operator intervention.
What to verify in your checklist:
- Automatic nesting with configurable spacing and margin rules
- Template margin enforcement to prevent placement drift across batches
- Ability to mix multiple SKUs on a single gang sheet
- ICC profile alignment maintained per design, not per sheet
- Output preview showing final layout before printing
Gang sheet workflows that require manual placement are a bottleneck. If your current software forces an operator to drag and drop every design, that time adds up fast across hundreds of daily orders.
5. Workflow automation and batch processing
Automated validation tools save production time by eliminating manual file checks and providing immediate feedback on errors. This matters more as order volume grows. A shop processing 50 orders a day can absorb manual checks. A shop processing 500 cannot.
Your checklist for automation should cover:
- Automated file validation on upload: Triggers preflight checks without operator input
- Batch job processing: Supports queuing and processing multiple designs and orders in sequence
- Unattended operation: Runs batch jobs without requiring an operator present at each step
- RIP queue integration: Feeds validated jobs directly into the production queue without manual transfer
- Color profile recalibration scheduling: Automates linearization workflows on a set interval
Batch processing and unattended operations are a key ROI driver when scaling garment printing. The productivity gains come not just from speed but from removing the human error that accumulates across repetitive manual tasks.
Pro Tip: Ask vendors to demonstrate a batch run of 20 or more jobs during your evaluation. Speed and reliability under load reveal more about the software than any feature list.
For print-on-demand operations connected to DTG order management, automation at the RIP stage is what separates shops that scale from shops that stall.
6. Comparison of top garment printing software options
Evaluating software against your checklist requires a structured comparison. The table below covers the key differentiators across common evaluation criteria.
| Criteria | Entry-Level RIP | Mid-Tier RIP | Professional RIP |
|---|---|---|---|
| Preflight automation | Manual or basic | Partial automation | Full automated validation |
| DTF/DTG dedicated modes | Limited or none | DTG standard, DTF add-on | Full DTF and DTG support |
| White ink channel calibration | Manual only | Semi-automated | Separate linearization per channel |
| Gang sheet nesting | Manual layout | Basic auto-nesting | Advanced nesting with ICC alignment |
| Batch processing | Single job queue | Multi-job queue | Unattended batch with scheduling |
| Integration with order management | None | API available | Native integrations |
| Pricing range | Low upfront cost | Mid-range subscription | Higher cost with ROI at volume |
The evaluation criteria that matter most depend on your volume. At low volume, ease of use and upfront cost dominate. At high volume, batch throughput and automated job sequencing are what actually drive production efficiency. Evaluating software only on UI features misses the operational impact entirely.
7. Decision-making tips for matching software to your business
Working through a garment printer software checklist gives you data. Turning that data into a decision requires one more step: matching your checklist results to your actual production needs and growth targets.
- Prioritize color accuracy if quality drives your brand. Shops competing on print quality need full ICC profile management and white ink calibration. Cutting corners here shows up in every order.
- Prioritize automation if volume is your growth lever. If you plan to scale order volume in the next 12 months, batch processing and unattended operation are non-negotiable features.
- Evaluate flexibility across garment types. Software that handles cotton DTG well but struggles with polyester blends or dark garments limits your product catalog.
- Calculate total cost of ownership, not just license cost. Factor in reprints avoided, labor saved on manual checks, and the cost of errors that automated validation prevents.
- Plan for integration from day one. Software that cannot connect to your production queue management or order management platform will create manual handoffs that slow you down as you grow.
Pro Tip: Run your top two software candidates on the same test file set, including a complex DTF gang sheet and a dark-garment DTG job. Real-world output comparison is more reliable than vendor demos.
The best garment printing software for your shop is the one that matches your current workflow and has room to grow with you. A checklist that covers preflight, color management, DTF/DTG support, and automation gives you an objective basis for that decision.
My take on software checklists and where shops go wrong
I’ve reviewed enough garment printing operations to see the same pattern repeat. A shop invests in a good printer, sources quality blanks, and then underestimates how much the software layer matters. The printer is only as good as the files it receives and the instructions it gets from the RIP.
The most overlooked item on any checklist for printing software is white ink calibration. Shops running DTF assume that activating the white channel is enough. It is not. Separate linearization for white ink is what prevents the fringe and opacity problems that generate customer complaints. I’ve seen shops run for months with suboptimal white ink output because no one on the team knew to look for it.
The second pattern I see is treating automation as a future upgrade rather than a current requirement. Shops tell me they’ll add batch processing when they hit a certain order volume. By the time they hit that volume, they’re already behind. The time to build automation into your workflow is before you need it, not after you’re drowning in manual queue management.
A garment printing setup guide that skips software evaluation is incomplete. The software stack is where print quality, production speed, and cost control either come together or fall apart. My advice is to treat the checklist as a living document. Revisit it every time you add a new printer, a new substrate, or a new sales channel.
— Michael
How Pythiastechnologies supports your garment printing workflow
Pythiastechnologies is a print-on-demand production automation platform built for garment printing businesses that need more than a basic RIP setup. The platform covers design and product management, production queue management, inventory tracking, and marketplace integration in one connected system.
For shops evaluating their software stack against a checklist, Pythiastechnologies addresses the operational layer that most RIP software leaves unmanaged: order routing, SKU tracking, batch job sequencing, and real-time production alerts. The platform features connect directly with your print workflow so validated jobs move from upload to queue without manual handoffs.
If you’re scaling a print-on-demand operation and need production automation that works alongside your garment printer software, explore the platform or book a demo to see it in action.
FAQ
What should a garment printer software checklist include?
A garment printer software checklist should cover preflight validation (300 DPI, CMYK, 0.125 inch bleed), DTF/DTG mode support, white ink channel calibration, gang sheet nesting, batch processing, and integration with order management systems.
Why is white ink calibration separate from CMYK in DTF software?
White ink channels require separate linearization because white ink behaves differently from CMYK pigments. Skipping this step causes opacity inconsistencies and white fringe that appear in the final print.
How does batch processing improve ROI for garment printing?
Batch processing reduces per-job setup time and allows unattended operation, which means more output with the same labor. Unattended batch operations are one of the highest-impact productivity features in professional RIP software.
What is the minimum resolution for garment print files?
Print files should be at least 300 DPI at final print size. Files below this threshold produce visible pixelation and are a leading cause of job rejection in preflight checks.
How do I choose between entry-level and professional RIP software?
Base the decision on your order volume and growth targets. Entry-level software works for low-volume shops, but professional RIP with automated batch processing and full DTF/DTG support delivers better ROI once daily order counts exceed 50 to 100 jobs.
Recommended
- DTG Printing Order Management for Print Shops in 2026 | Pythias Technologies | Pythias Technologies
- Pythias Technologies — Print-on-Demand Automation Platform
- Features | Pythias Technologies | Pythias Technologies
- Services | Pythias Technologies — Print-on-Demand Automation Platform | Pythias Technologies